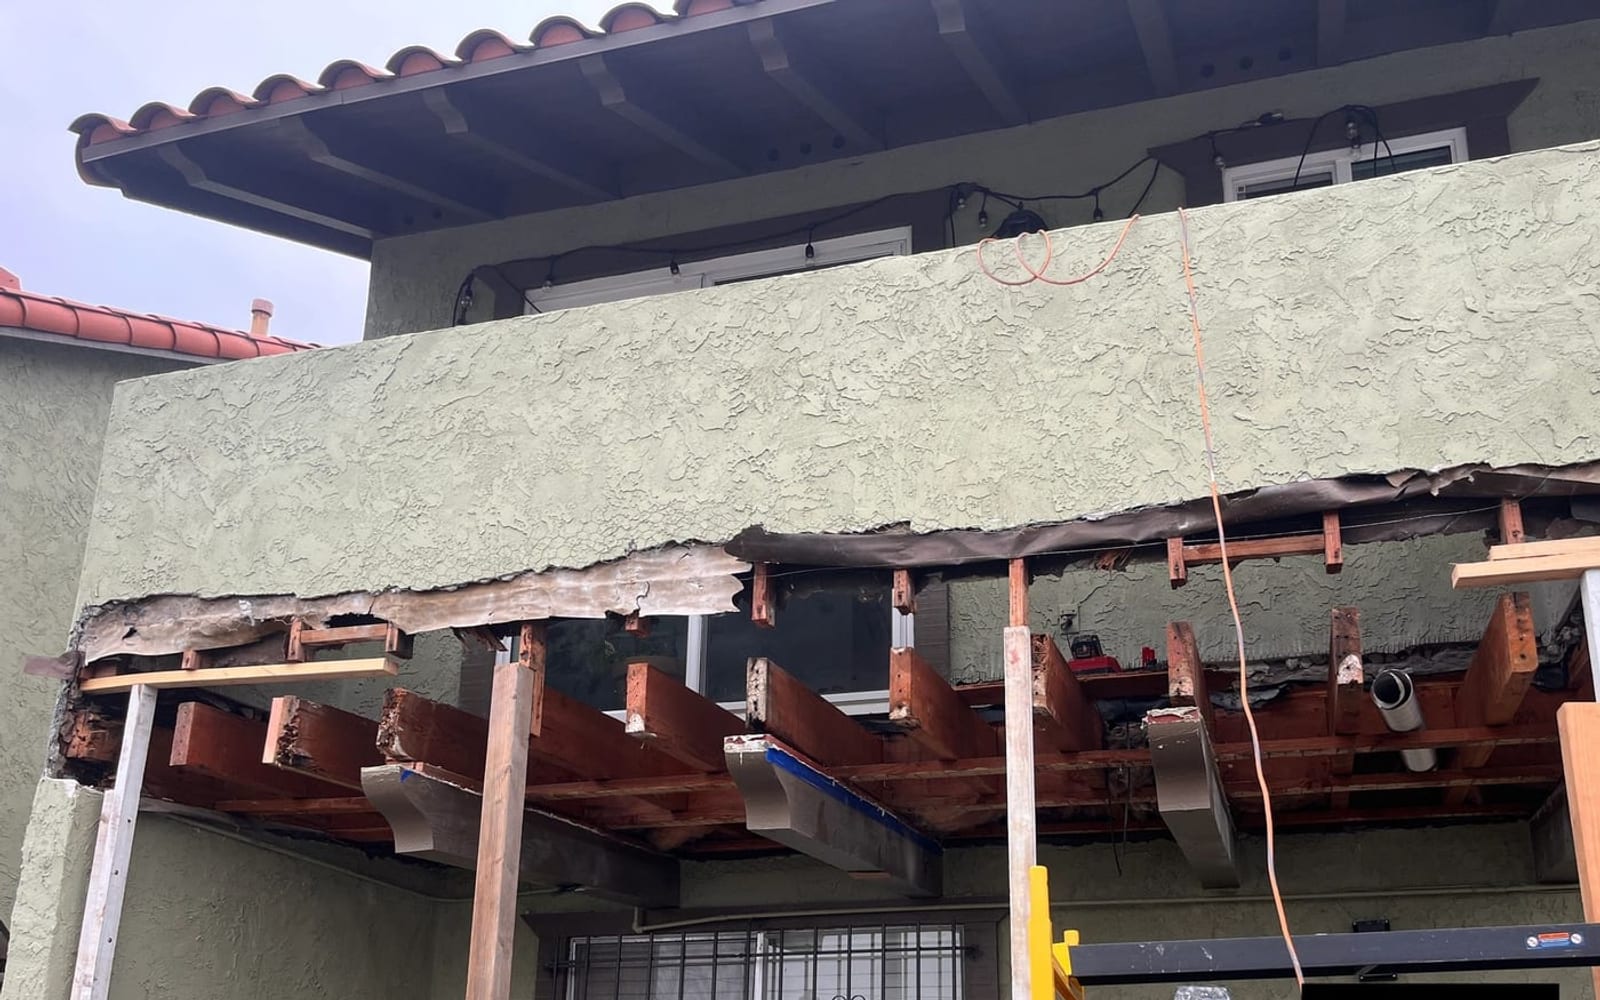
Visible wood condition is the starting point
Record softness, splits, open joints, failed coatings, staining, movement and prior patch locations without assigning a concealed cause. Wide photos show exposure and connections; close photos show texture and local damage. Note whether the symptom changes after rain and whether it occurs at a tread, stringer, landing edge, post base or wall interface. Those observations help decide where a field evaluation should focus and whether use restrictions need separate attention.
The source condition belongs in the repair
Replacing damaged wood without addressing the contributing exposure or water path can leave the new work vulnerable. The scope may need to consider horizontal surfaces, end conditions, flashing, coating transitions, penetrations, drainage and adjacent walls. The correct detail depends on the actual assembly. A webpage cannot prescribe one universal flashing or coating method for every wood stair, and a photograph cannot confirm what is behind a finished surface.
Define investigation and decision points
A useful scope states which surfaces are removed, what conditions trigger added review, who provides direction when structural questions arise and how changes are documented. It should avoid an unlimited promise to replace “all rot” when the boundaries are unknown. It should also avoid a cosmetic allowance that ignores likely concealed work. A written assumption can be priced; an unstated assumption usually becomes conflict after demolition.
Plan protection and temporary access
Wood stair demolition creates debris, exposed edges and an interrupted route. Occupied properties may require barriers, dust and debris control, delivery planning, resident notices and an alternate access decision. Temporary stairs, shoring or other special measures should not be assumed from a generic guide; the project team must define what is needed for the actual building and sequence. Weather and cure requirements may also affect how long an area remains restricted.
Close with documented layers and finish limits
Progress photos can document visible work stages, but they should be paired with the written scope, approved changes and any required inspection or professional records. Before finishes close the assembly, confirm that the planned repair, water details and attachment work are ready for the next stage. At completion, document the agreed coating, paint, trim or stucco limits and identify maintenance information supplied for the actual materials used.
Treat soft or deteriorated wood as a reason to review the assembly and water path. Do not let a surface photo become a claim about concealed extent or structural capacity.
Continue planning
Exterior Stair Repair: Define the Assembly Before the Patch
Learn how AWC scopes exterior stair, landing, railing, framing, waterproofing and finish repairs for San Diego properties.
Read the guideExterior Stair Landing Leaks and Waterproofing Interfaces
Plan exterior stair landing leak repairs by reviewing surfaces, edges, walls, penetrations, drainage and concealed substrate risk together.
Read the guideTurn an Exterior Stair Report Into a Construction Scope
Organize report findings, photos, affected-element IDs, missing information and responsible reviews into a practical exterior stair repair scope.
Read the guide